Turn Figma designs into real websites in a few clicks
(Note that Pygma is still in beta and you might run into bugs. If you do we are on hand to fix them ASAP for you. Just send an email to emile@pygma.app if you need help)
Features
- Create multiple projects/websites
- Create unlimited pages for each website
- Responsive breakpoints – group breakpoint frames under one page and the deployed site will be automatically responsive.
- One-click deployment of updates
- Connect a custom domain
How to use
Create an account
- Log in / sign up using Figma OAuth – Pygma only has access to the files you specify.
Create a project
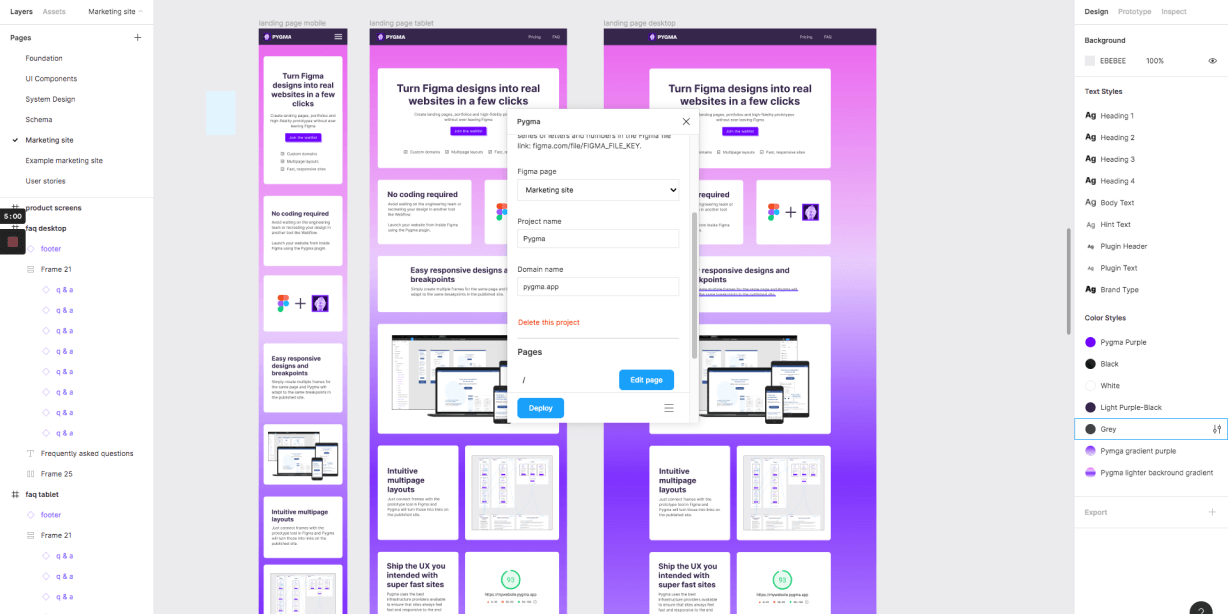
- Make sure you are in the same Figma file as the design you want to turn into a website.
- Add the Figma file key which is needed to publish your site. You can find this from the Share link for your file.
- Choose the Figma page that contains the frames for your site.
- Give your project a name.
- A random subdomain on pygma.app will be generated for your site, but you can change this later.
Create a page
- Add the path for your page. For example, for the homepage you might use ‘/’ or ‘/pricing’ for the pricing page.
- Add the title for the page (this is the title that will appear in the browser).
- Add the frames for the page. If you have multiple frames for different breakpoints, check all of them and they will become responsive breakpoints in the final website.
Connect a domain (temporarily free, will be paid in the near future)
- You can change a project’s domain on the project config page. Once you use a custom domain, you will see DNS settings for the A record and CNAME record appear underneath the domain. Add these to the DNS registrar where you purchased or manage your domain. Here’s some links to a few guides:
Deploy a site
- Once your pages have been added, just click the deploy button – this process is usually complete within 2 minutes and you will be able to go to your domain/subdomain to see your site (if it’s a custom domain you will need to connect it first as above).
Add links between pages
- Just connect frames using the prototype tool in Figma and Pygma will interpret these as links in the final site.
Add external links
- In the name of the layer/node that you want to add an external link to, add a ‘#’ followed by the full link inlcuding the scheme. E.g. to add a link to Pygma on a button with name ‘button / primary’ in Figma, it would become ‘button / primary #https://pygma.app’.
Manage subscription
- Open the menu and go to “Billing”. From there you can manage your subscription using Stripe Portal.
Unsynced account/config changes.
- In rare events, some data might be out of sync (e.g. your subscription status). Try logging out and logging in again to fix this.
